I may earn a commission at no extra cost to you. #ad
The Complete Free Guide to Building a Professional At-Home Soak-Off Gel Kit
Jump to Section
- The Evolution of the At-Home Manicure
- The Core: Choosing Your UV/LED Lamp
- Preparation Essentials: Beyond the Buffer
- The Liquid Trio: Base, Color, and Top Coat
- Precision Application: Brushes and Cleanup
- Safe Removal: Protecting Your Natural Nails
- Maintaining Your Kit for Longevity
- Frequently Asked Questions
Transitioning from standard nail polish to soak-off gel is a revelation for many. The promise of two to three weeks of chip-free, high-gloss wear is enticing, but achieving professional results at home requires more than just a bottle of color. Most "all-in-one" kits found in big-box stores often cut corners on lamp quality and chemical purity.
Building a professional-grade kit involves selecting components that work in harmony with the biology of your natural nail. In this guide, we will break down the essential pillars of a pro-level soak-off gel system, ensuring your investment leads to healthy nails and impeccable aesthetics.
The Core: Choosing Your UV/LED Lamp
The lamp is the heart of your kit. Without proper curing, gel polish remains under-cured, which is the leading cause of contact dermatitis and premature lifting. Professional soak-off gels usually require a "Dual Wave" LED lamp that emits light in the 365nm and 405nm ranges.
Look for a lamp with at least 36 Watts. Lower wattage lamps may take significantly longer or fail to cure the "middle" layer of the gel. Ensure the lamp has a removable bottom plate for easy cleaning and pedicures, and integrated timers to ensure consistent exposure. Remember: "Dry" to the touch does not always mean "Cured" to the core.
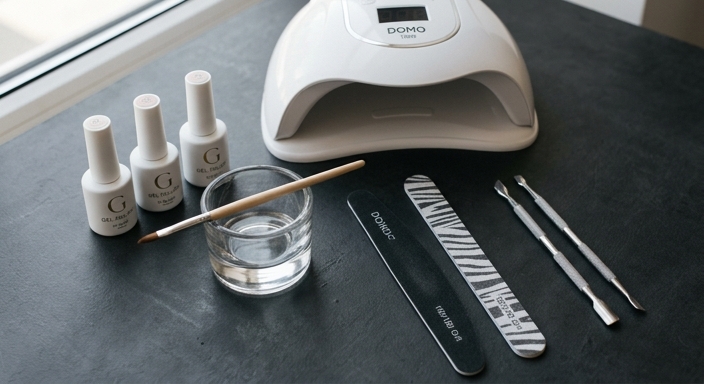
Preparation Essentials: Beyond the Buffer
If your gel peels off within a few days, the culprit is almost always prep. A professional kit must include tools to perform a "dry manicure." This means no soaking your hands in water, as the nail plate absorbs moisture and expands, then shrinks later, causing the gel to pop off.
- Stainless Steel Cuticle Pusher: To gently lift the eponychium and clear the true cuticle from the nail plate.
- 180/240 Grit Files: Use the 240 grit to lightly remove the shine from the natural nail without thinning the plate.
- Lint-Free Wipes: Standard cotton pads leave tiny fibers that ruin a gel finish. Lint-free wipes are non-negotiable.
- Dehydrator and Primer: A pH-balancing dehydrator removes oils, while an acid-free primer creates a chemical bond between the nail and the base coat.
The Liquid Trio: Base, Color, and Top Coat
Professional systems are designed to be used as a "sandwich." While some brands claim "one-step" efficacy, a professional kit relies on the specific roles of each layer.
The Base Coat: Look for a "Rubber Base" if you have flexible or weak nails. It provides a flexible foundation that moves with your nail. A standard soak-off base is perfect for healthy, hard nails.
The Color: High-pigment soak-off gels allow for thin coats. Thick coats are the enemy of gel nails—they often lead to "wrinkling" inside the lamp because the light cannot penetrate the pigment.
The Top Coat: Choose a "No-Wipe" top coat for ease of use. It cures without a sticky inhibition layer, leaving a glass-like finish immediately. For a sophisticated look, include a Matte top coat in your kit.
Precision Application: Brushes and Cleanup
Even the best gel polish can look messy without the right application tools. While most gels come with a brush-in-bottle, a separate fine-liner brush is essential for "tucking" the color near the cuticle for a seamless grow-out. Additionally, keep a flat cleanup brush dipped in isopropyl alcohol (90%+) nearby to erase any slips before you put your hand in the lamp. Once it's cured, it's permanent!
Safe Removal: Protecting Your Natural Nails
A professional kit is only as good as its removal process. Damage often blamed on gel is actually caused by improper removal. Your kit should include:
- Pure Acetone: Do not use "Nail Polish Remover," which often contains oils and water.
- Foil Wraps or Silicone Caps: To trap heat and speed up the breakdown of the gel.
- Orange Wood Sticks: To gently nudge the dissolved gel off. Never scrape with metal during removal as the nail is softened and vulnerable.
- Cuticle Oil: Essential for rehydrating the skin and nail plate after the drying effects of acetone.
Maintaining Your Kit for Longevity
To keep your professional kit in top shape, storage is key. Gel is photosensitive. Keep your bottles away from windows and never leave them open near your UV/LED lamp while it is running. Wipe the necks of your bottles with alcohol before closing to prevent the caps from gluing shut. Clean your brushes with clear base gel and store them horizontally in a dark drawer.
Frequently Asked Questions
The UV/LED lamp is the most critical component. Without a high-quality lamp with the correct wavelength (365nm-405nm) and at least 36W of power, the gel will not cure properly.
It is not recommended. Regular polish air-dries, while gel cures. If the regular polish isn't 100% dry, trapped moisture can cause the gel to peel or create a breeding ground for bacteria.
Yes. Proper prep is 90% of the work. A dehydrator removes surface oils, and a primer acts like double-sided tape for the gel.
With proper cleaning using clear base gel, a high-quality synthetic brush can last years. Replace them only if the bristles become frayed or cured.