The French manicure is the ultimate symbol of timeless elegance. Often referred to as "Quiet Luxury" in the modern beauty world, a clean French tip complements any outfit, occasion, or nail shape. However, achieving that crisp, symmetrical "smile line" using soak-off gel can be intimidating for both enthusiasts and professionals alike.
Using premium soak-off gel like Candy Gel offers a distinct advantage over traditional lacquer. Gel provides a superior viscosity that doesn’t dry until you cure it, giving you the infinite time you need to perfect your lines. In this guide, we will walk you through the professional methodology for creating a flawless French tip that lasts up to three weeks without chipping.
Before you begin, ensure your workstation is stocked with the right high-performance products. A French manicure is only as good as the tools used to create it.
Longevity starts with prep. Even the most beautiful French tip will look subpar if the surrounding cuticles are messy or if the gel lifts within days. Start by gently pushing back the cuticles and removing the non-living tissue from the nail plate. Use a 180-grit file to shape the free edge—almond and square are classic choices for this look.
Dehydrate the nail plate using a professional cleanser and apply a high-quality primer. This ensures the soak-off gel base bonds perfectly, preventing the dreaded "peeling" that can ruin your artwork.
The base color sets the tone. For a traditional look, choose a semi-sheer milky pink. If you prefer a more modern "American Manicure," go for a soft beige or nude. Apply one thin layer of base color and cure for 60 seconds in an LED lamp. If you want more coverage, apply a second thin layer. Pro Tip: Ensure the base is perfectly smooth; any ridges will make drawing the smile line significantly harder.
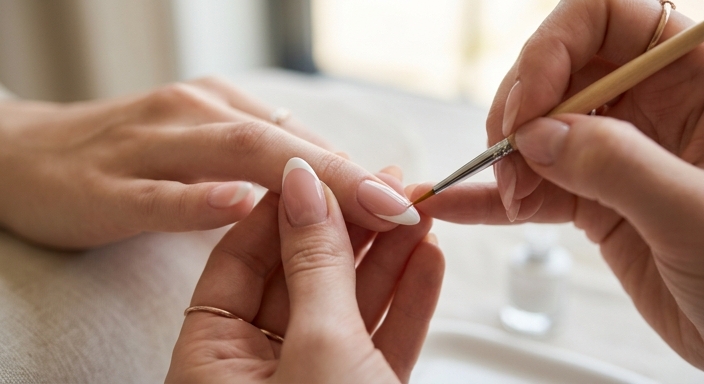
The "smile line" is the curved boundary between the nail bed and the white tip. Here are three ways to master it:
Mark three tiny dots with your liner brush: one in the center of the free edge and one on each side where the tip meets the sidewall. Connect these dots in a graceful arc. This ensures symmetry every time.
2. The Side-to-Center StrokeStarting from the left sidewall, draw a thin line curving toward the center of the tip. Repeat from the right side. This technique is favored by many professionals for creating a "deep" smile line that elongates the look of the nail bed.
3. The Silicone Stamper HackFor beginners, apply a small amount of white gel to a silicone nail stamper. Gently press the tip of your nail into the stamper at a 45-degree angle. This creates an instant French line that you can then refine with a brush.
Once you have drawn your lines, do not cure immediately! This is the magic of premium soak-off gel. Take a clean-up brush lightly moistened with alcohol and "carve" the smile line from the nail bed side. This sharpens the edge and removes any wobbles. Once you are 100% satisfied with the symmetry across all ten fingers, cure for a full 60 seconds. High-pigment whites require the full curing time to ensure the center of the gel is hardened.
The final step is the most satisfying. A premium top coat not only adds shine but also levels out the slight "bump" created by the white gel tip. Apply a slightly thicker layer of top coat in the center of the nail and allow it to self-level for 5 seconds before curing. This creates a seamless, glass-like surface. If you are using a soak-off system, ensure you seal the "free edge" (the very front edge of the nail) to prevent the white tip from chipping off during daily activities.
This usually happens if the gel is too thin or low in pigment. Use a high-viscosity, high-pigment "art gel" or a premium soak-off white designed for one-coat coverage. Avoid over-working the product with your brush.
For short nails, a shallow, flatter smile line works best. For long almond or coffin nails, a deeper, more dramatic "V" or "U" shape helps maintain balance and elegance.
Yes! A dotting tool is excellent for "dragging" the gel along the edge, but you will likely still need a fine liner brush to sharpen the corners where the tip meets the skin.
Premium Soak-Off Gel Polish
View on AmazonFrench Tip Nail Brush Set
View on AmazonShare this guide:
If you found this guide helpful, consider leaving a tip!