Free Guide: How to Transition from Standard Polish to Premium Soak-Off Gel Systems
Jump to Section
- Understanding the Differences: Polish vs. Gel
- Essential Equipment for Your Gel Transition
- Preparing the Canvas: Nail Plate Prep
- The Application Technique: A Step-by-Step Guide
- The Science of Curing: UV vs. LED Lamps
- Safe Removal: Protecting Your Natural Nails
- Common Transition Mistakes to Avoid
- Frequently Asked Questions
If you have spent years relying on standard nail lacquer, you are likely familiar with the frustration of chips appearing within 48 hours and the "waiting game" of air-drying. Moving to a premium soak-off gel system is more than just a change in product; it is a fundamental shift in how you treat and wear manicures. Gel systems offer a high-gloss, durable finish that lasts for weeks rather than days. This guide will walk you through everything you need to know to make the switch seamlessly and professionally.
Understanding the Differences: Polish vs. Gel
Standard nail polish (lacquer) dries through the evaporation of solvents. It is a simple, air-dry process that results in a flexible coating. However, this flexibility also makes it prone to chipping and peeling.
Soak-off gel systems, like those offered by Candy Gel, are composed of photo-reactive oligomers. They do not "dry" in the traditional sense; instead, they "cure" under specific wavelengths of light. This chemical reaction, known as polymerization, creates a hard, resilient plastic-like coating that bonds to the nail plate. Unlike hard gels used for extensions, soak-off gels are designed to be dissolved in acetone, making them safer for natural nail enthusiasts.
Essential Equipment for Your Gel Transition
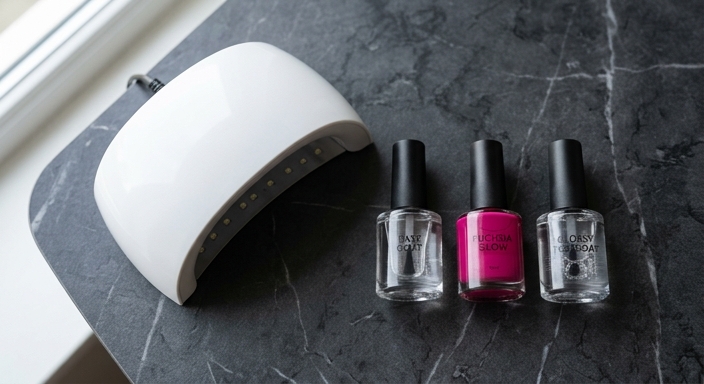
To transition successfully, you cannot simply swap the bottle. You need a complete ecosystem of tools. Here is what you must have in your kit:
- UV/LED Lamp: The heart of the system. High-quality lamps ensure a full cure, preventing allergies and lifting.
- Gel Base Coat: Acts as the foundation and "double-sided tape" between your nail and the color.
- Premium Gel Color: Highly pigmented, professional-grade soak-off gel.
- Gel Top Coat: Provides the high-gloss seal (or matte finish) and protects the color from scratches.
- Nail Dehydrator and Primer: Essential for removing oils and ensuring maximum adhesion.
- Isopropyl Alcohol (90% or higher): For cleansing the inhibition (sticky) layer if using non-wipe top coats.
Preparing the Canvas: Nail Plate Prep
The biggest reason gel manicures fail (lift) is improper preparation. With standard polish, you can get away with a quick wipe. With gel, prep is 90% of the work. You must remove the "true cuticle"—the thin layer of dead skin on the nail plate—using a pusher or a specialized bit. Next, gently buff the shine off the nail with a high-grit buffer (180/240). You aren't thinning the nail; you are just creating a "tooth" for the gel to grab onto.
The Application Technique: A Step-by-Step Guide
When applying premium gel, "thin to win" is the golden rule. Gel is much thicker than lacquer and behaves differently. If applied too thickly, it will wrinkle in the lamp or peel off in sheets.
- Dehydrate: Wipe each nail with alcohol or a dedicated dehydrator.
- Base Coat: Apply a very thin layer. "Scrub" it into the nail plate and cure for 30-60 seconds.
- Color Coats: Apply two thin layers of color. Always "cap the free edge" by running the brush along the very tip of the nail to seal the gel. Cure each layer individually.
- Top Coat: Apply your final seal, ensuring you cover all color and the free edge. Cure for a full 60 seconds.
The Science of Curing: UV vs. LED Lamps
Modern premium systems predominantly use LED-curing technology because it is faster (30-60 seconds vs. 2-3 minutes). When transitioning, ensure your lamp's wattage and wavelength match your gel system. Most professional soak-off gels cure at a wavelength of 365-405nm. Using an underpowered lamp is the leading cause of "uncured gel" which can lead to skin sensitivities over time.
Safe Removal: Protecting Your Natural Nails
The "soak-off" in soak-off gel is literal. Never, ever peel or scrape your gel off. Peeling gel removes layers of your natural nail plate, leading to thinning and breakage. To remove, lightly file the top coat to break the seal, then soak cotton pads in pure acetone. Secure them to your nails with foil wraps or clips for 10-15 minutes. The gel should flake off effortlessly with an orange wood stick.
Common Transition Mistakes to Avoid
Transitioning users often struggle with cuticle flooding. If gel touches the skin or cuticle and is سپس (then) cured, it creates a ledge that will catch on hair and clothes, causing the entire manicure to lift. If you get gel on your skin, wipe it off with a clean brush dipped in alcohol *before* you put your hand in the lamp. Another mistake is forgetting to cap the free edge, which leads to premature chipping at the tips.
Frequently Asked Questions
No. Damage is almost always caused by improper removal (scraping or peeling) or over-buffing during the preparation phase. When used correctly, gel can actually help protect weak nails as they grow.
No. Regular top coats are air-dry and will not bond properly to the gel surface. You must use a dedicated gel top coat that requires curing in a lamp.
A premium system like Candy Gel typically lasts 14 to 21 days with proper application and aftercare. Growth at the cuticle usually determines when it's time for a change, rather than chipping.